
Retr0br1ght Box
So there is this thing with old plastic gears and how it get yellowed by time. You don’t need to be a smoker, since it will occur anyway due to a fire-retardand substance called bromine combined with ultraviolet (UV) light. The solution to this is to have a solution of hydrogen peroxide and expose it to UV light. It is also popular to mix it with Xantham gum or arrowroot so it will be more easy to apply.
The best UV source to use is the sun. But sadly, where I live and especially during the winter it is more or less impossible to perform the Retr0br1ght due to useless forecasts, wind and cold weather. My solution to this was to build a Retrobright Box that make it possible to perform the procedure no matter what time of the year it was.
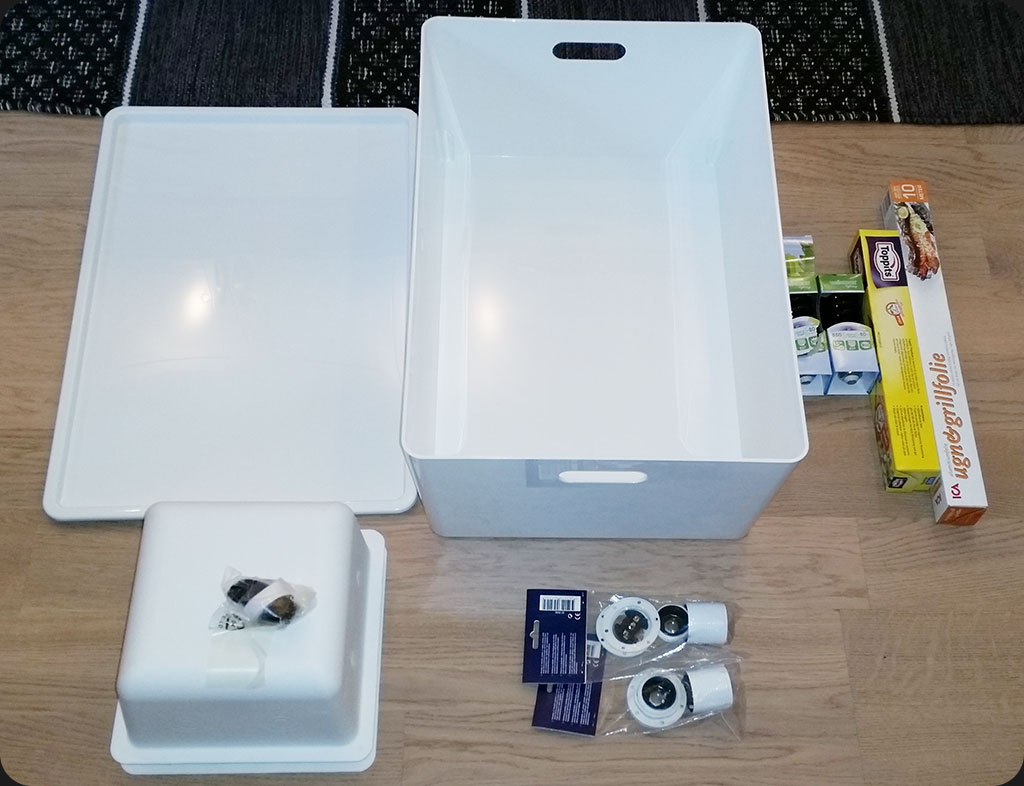
So, what I needed was a box with a top lid. Two smaller boxes so it would be possible to raise the UV lamps to a suitable position, UV lamps with electrical sockets and aluminum foil. I found my parts at IKEA, Clas Ohlsson and a grocery store.

Let’s build it
First step was to measure where the holes should be for the UV-lamp housing. Just use some double grip tejp on the housing and place them where it looks good, or if your OCD demands total accuracy you will of course use a ruler.

When making the holes, I used a Japanese kind hand saw. They are perfect to cut and saw in plastic and served my purpose very well in this case. Before you cut the holes, be 100% sure that you have some margin for the UV-light houses.

Time for to put assemble the UV-light houses on the top using glue. I used standard melting glue with a rather high temperature so the bonding would be good.

While I was at it I also put an extra string of glue at the edges where the UV-light house meets the top lid. This is to remove any sharp edges so the aluminum foil will not rip/break. It now time to cover the inner of the box with foil and also the top lid. A tip is to start with the inside of the UV-light house first and the work outwards.
I attached the aluminum foil to the box/top lid/housing using standard black electrical tejp.

Now to the first test
When it all was assembled and tested, as you can see on the picture above it is time to test the box of Retro Brightness. Prepared a board with aluminum foil and then took some yellowed parts and put 12% solution hair bleach on them. After that I put some cling film over it all so it would “stay in place”.
Then I put it in the box, closing the top lid, connected the UV-lamps and waited for about 8 hours.

Test was perfect! You can see some of them in a previous blog of my Amiga 4000T.