
Cap Work
This is project has been planned for a few months but I never had the time to do it due to work and training. While I was doing some with with my Amiga 4000D I found some suspicious capacitors that had to me removed and replaced with new healthy ones. This is a fairly hard task if you do not have so much experience with removing and soldering SMD components.
If I hadn’t had the help from Chucky (well known in the Amiga sphere) I would never have pulled it this of.
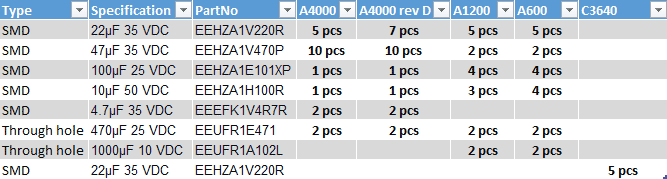
Chucky provided me with a list of high quality capacitors that was needed for different models of Amiga with their values and part numbers. I took that list and put it in Excel so it would be easier to get a view on what values and how many you need for a capacitor-rework.
I also found a good picture on internet that was a huge help, showing where all the capacitors is located and their values.
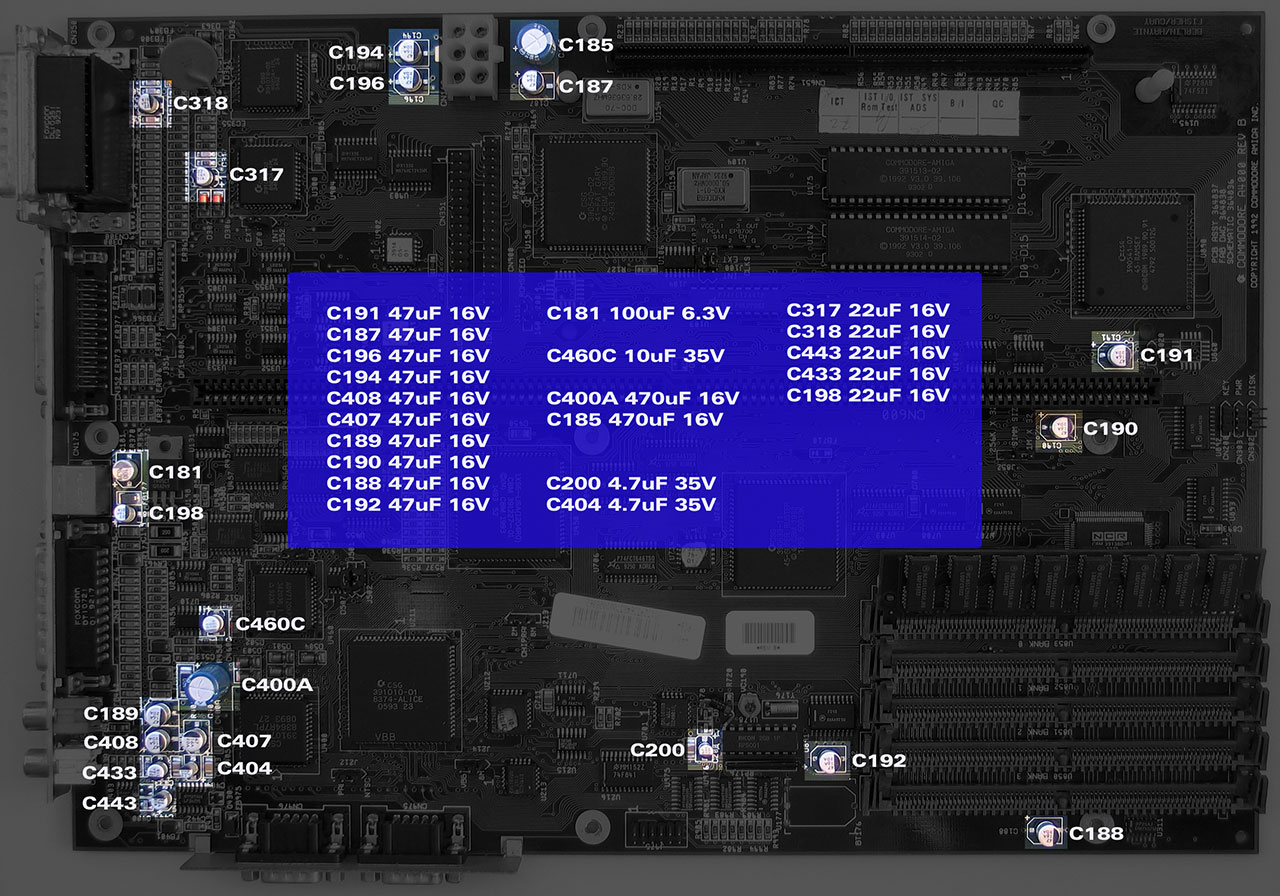
Please observe that the capacitors C433 and C443 are turned in the wrong way as default so you need to reverse their polarization.
Most of the capacitors are SMD but there is also a few hole-through. I used a hot-air station with the temperature set to max 290 degrees celcius to remove the SMD capacitors with the smallest nozzle. This was not hard at all, but you have to keep an eye open for surrounding components and copper tracks.
I heard that a beer will make your hand more steady. This rumor was worth trying but I don’t know if the beer made me more steady, but it was very good anway 🙂

The result
Well, perfect!
The sound now is crystal clear and I also cannot see any of the previous vertical bars when using native with out Indivision AGA. Hopefully it will work a few more years before I have to change them again 🙂
Important!
If you feel the least unsure, let someone who knows what he/she is doing do the work for you.