
72MHz CSPPC
A few times I have red and been inspired by a page explaining how to increase the speed of a Phase 5 Cyberstorm PPC. It looked fairly simple and the instructions was really good so I thought why not and decided to do it while I did replace the capacitors.
The Cyberstorm PPC (CSPPC) is prepared to be fitted by a third oscillator by default. When sold it is equipped with two oscillators, where the first is assigned to the PPC and the second is for the system and 680×0 CPU.
By adding a third oscillator [ 1 ] and move a small jumper (solder) [ 2 ] you can overclock the 680×0 your CSPPC and still keep other parts, like SCSI, to the original set system speed.
[imageeffect type=”lightbox” width=”670″ height=”320″ alt=”” url=”https://www.ikod.se/wp-content/uploads/2015/08/csppc.jpg” ]
I found a DIL8 socket 72MHz oscillator on Amibay that I ordered directly and after a few days it arrived to me by mail.

Overclocking
The fitting itself was very easy, four solder points and the oscillator was in place. After that, the more complicate work starts and that is to move a small jumper. As dedault, the jumpers look like the following when a MC68060 is mounted on the card equipped with two oscillators.
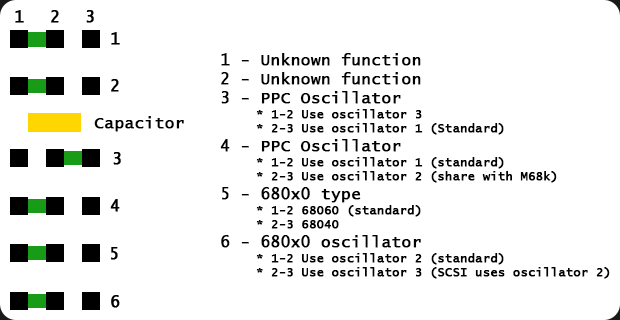
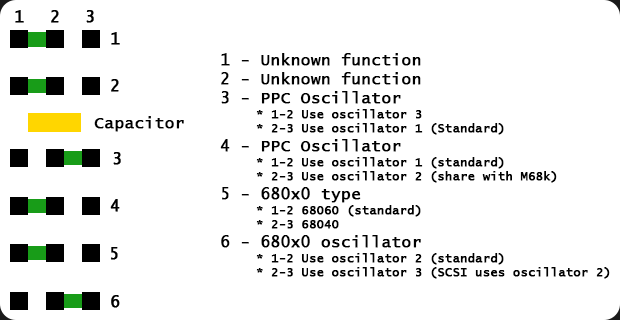
When the job with moving the jumper is done, it should look something like this.
Testing
Ok, the moment of truth. My Amiga 4000D is now partially assembled, enough to boot and see of it will work and if Amiga OS 3.9 is stable. The boot went fine, softkick performed without any guru meditation and the system was very responsive. Fired up the latest WhichAmiga and waited with excitement of the result.
Holy… It works, and it works good.
[imageeffect type=”lightbox” align=”aligncenter” width=”670″ height=”502″ alt=”” url=”https://www.ikod.se/wp-content/uploads/2015/08/Result.png” ]
Cooling
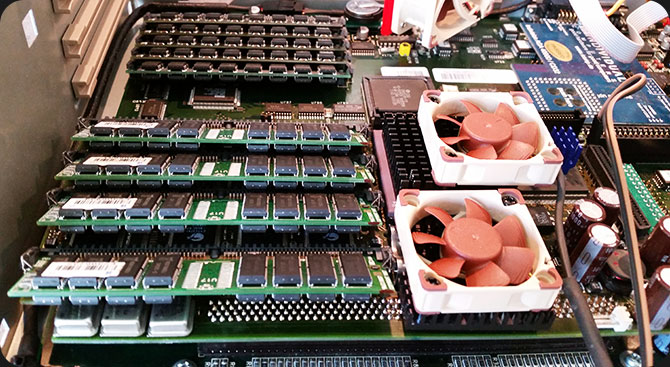
With overclocking comes heat and the memory controller chip are known to we warm even on non-overclocked CSPPC so I had to avoid the controller to overheat at any cost. I had a few ideas and one of them was to put a fan between the front of the chassi and the CSPPC-card. After some thinking I decided to take another approach. This is mainly because the fan would not get enough air to push due to lack of space between the CSPPC and the front.
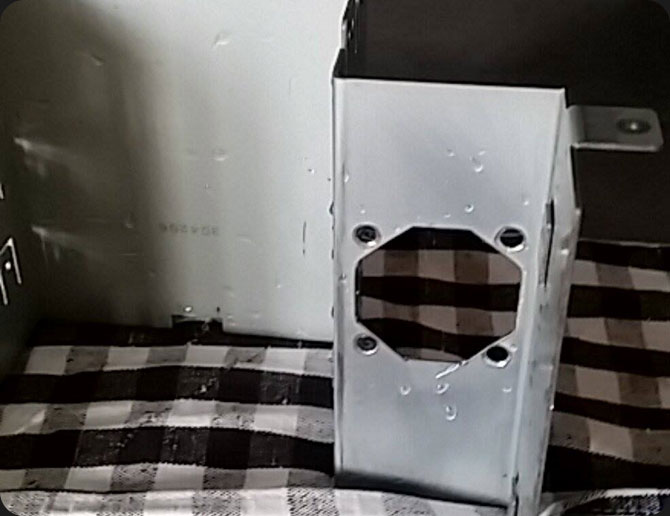
Since I have used my 5.25″ bay for 3 Noctua fans I decided to cut a hole on the side of the 5.25″ bay, right above the memory controller that is located near memory bank 2.
After some measurement and work with my Dremel I had made a hole that would fit a 40mm Noctua fan just perfectly.
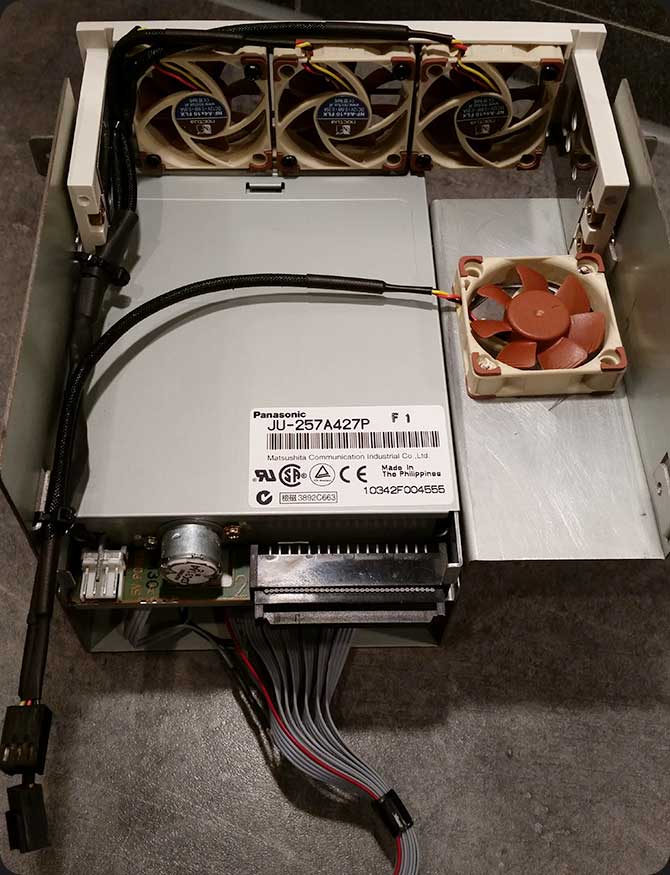
When the 40mm fan was mounted among the GOTEK, standard floppy drive and the 3-fan 5.25″ cassette it looks like this.
While I was at it I took my chance to replace the old fans on my CSPPC to the more silent and effective Noctua. As you also might notice the CSPPC now has three oscillators instead of two. The fan on the 68060 had to be moved a little bit to the right, else the display connector on my CyberVision would not fit.
One last thing
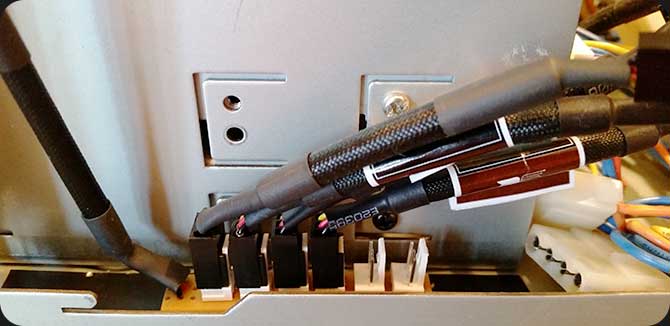
Oh well, a cool system is a system that works good but also a system that has sh*tloads of fans to connect. Normally, you can solder/pair cables up together to save connectors but since that creates a less mod friendly system I took a piece of PCB stripboard and created a connector base for my fans.
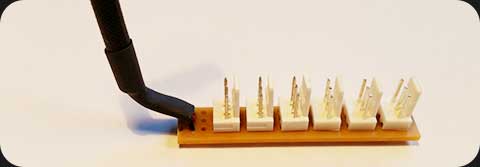
I tried to avoid missing connectors if I decide to add more fans in the future. This is how it looks like when it is mounted in my Amiga 4000.
That is all for now! Please leave a comment if you have questions and/or if you like it 🙂