
A4000 Chillin
I have had a smaller pause from my hardware project due to training and high load at work. There has been alot of coding in AsmOne but I have not finished the M68k code highlighter so I haven’t been able to publish any results yet.
Anyhow, while I was coding I realized that my Amiga 4000 sounded like a freaking jet plane. Keeping your Amiga cold is good but to what price? The setup I had was
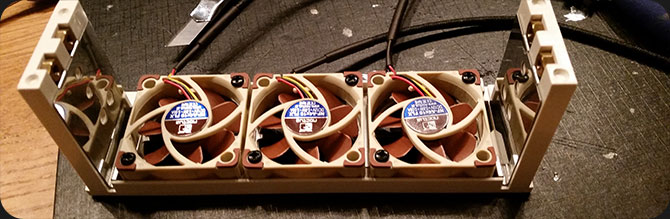
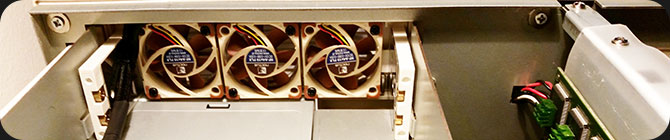
- 1x 5.25″ fan holder with 3x 40mm fans in the front.
- 2x Akasa fans with heatpipes one on the MC68060 and one on the PPC CPU.
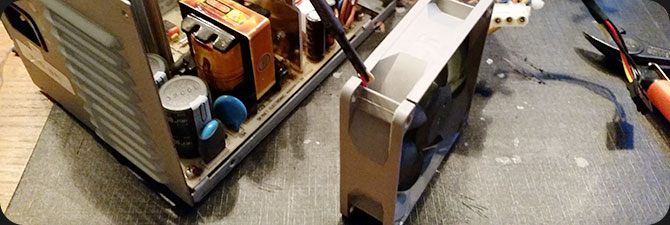
- 1x old 80mm fan in the PSU
It worked but as I mentioned earlier it was very noisy. So now I have a goal that is to make my Amiga 4000 even better cooled and lower the noise level to the minimum.
I did some quick research and found that Noctua did some very good and quiet quality fans. A quick summarize was made and I also found that the Indivision AGA MK1 generated quite much heat. So that needed to be cooled as well.
I remembered that I found a fan holder for a 60mm fan on Thingiverse.com so I looked it up and had it printed.
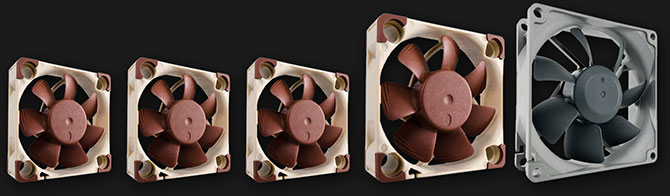
After that I ordered 1x 80mm fan for the PSU, 1x 60mm fan for the newly 3D printed fan holder and 3x 40mm for the front panel.
Time to install
The PSU was rather simple to modify. Simple open it up, cut the wires and then re-solder the new fan into place. Just be sure to mount it so it sucks air from inside to outside.
After I replaced all 3 old 40mm fans in the front panel I was quite pleased with the result. Even with a quick test the noise level was very low compared to before.
The installation in my Amiga 4000 was as easy as it could be and the result was still good. Even if fans can be silent outside the case they can generate noise when mounted inside the machine. In this case they stayed silent but with a slight increase, which is normal.
Adding the new fan
When I received the first picture of the newly printed fan holder I was surprised of the result. This was a very simple but brilliant idea!
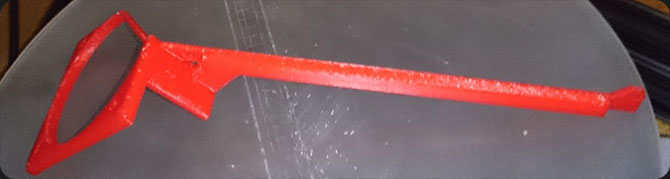
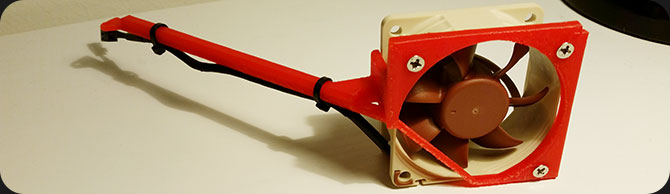
The actual mounting needed some extra parts. I had to arrange 2x20mm, 2x15mm and 2x10mm pieces of m3 distances that should get the fan holder on the correct level, without touching any components on the mainboard. I removed the two screws on the left back on the mainboard and replaced then with the distanseces. The fan holder was then mounted and connected.

The result is amazing…
Even with an extra fan inside the machine now had a lower temperature than before and the noise level was very low.
I used that very Thingaverse model and modified it a bit for use in my A4000. It works very nicely keeping the Mediator and 4 PCI cards cool.